반응형

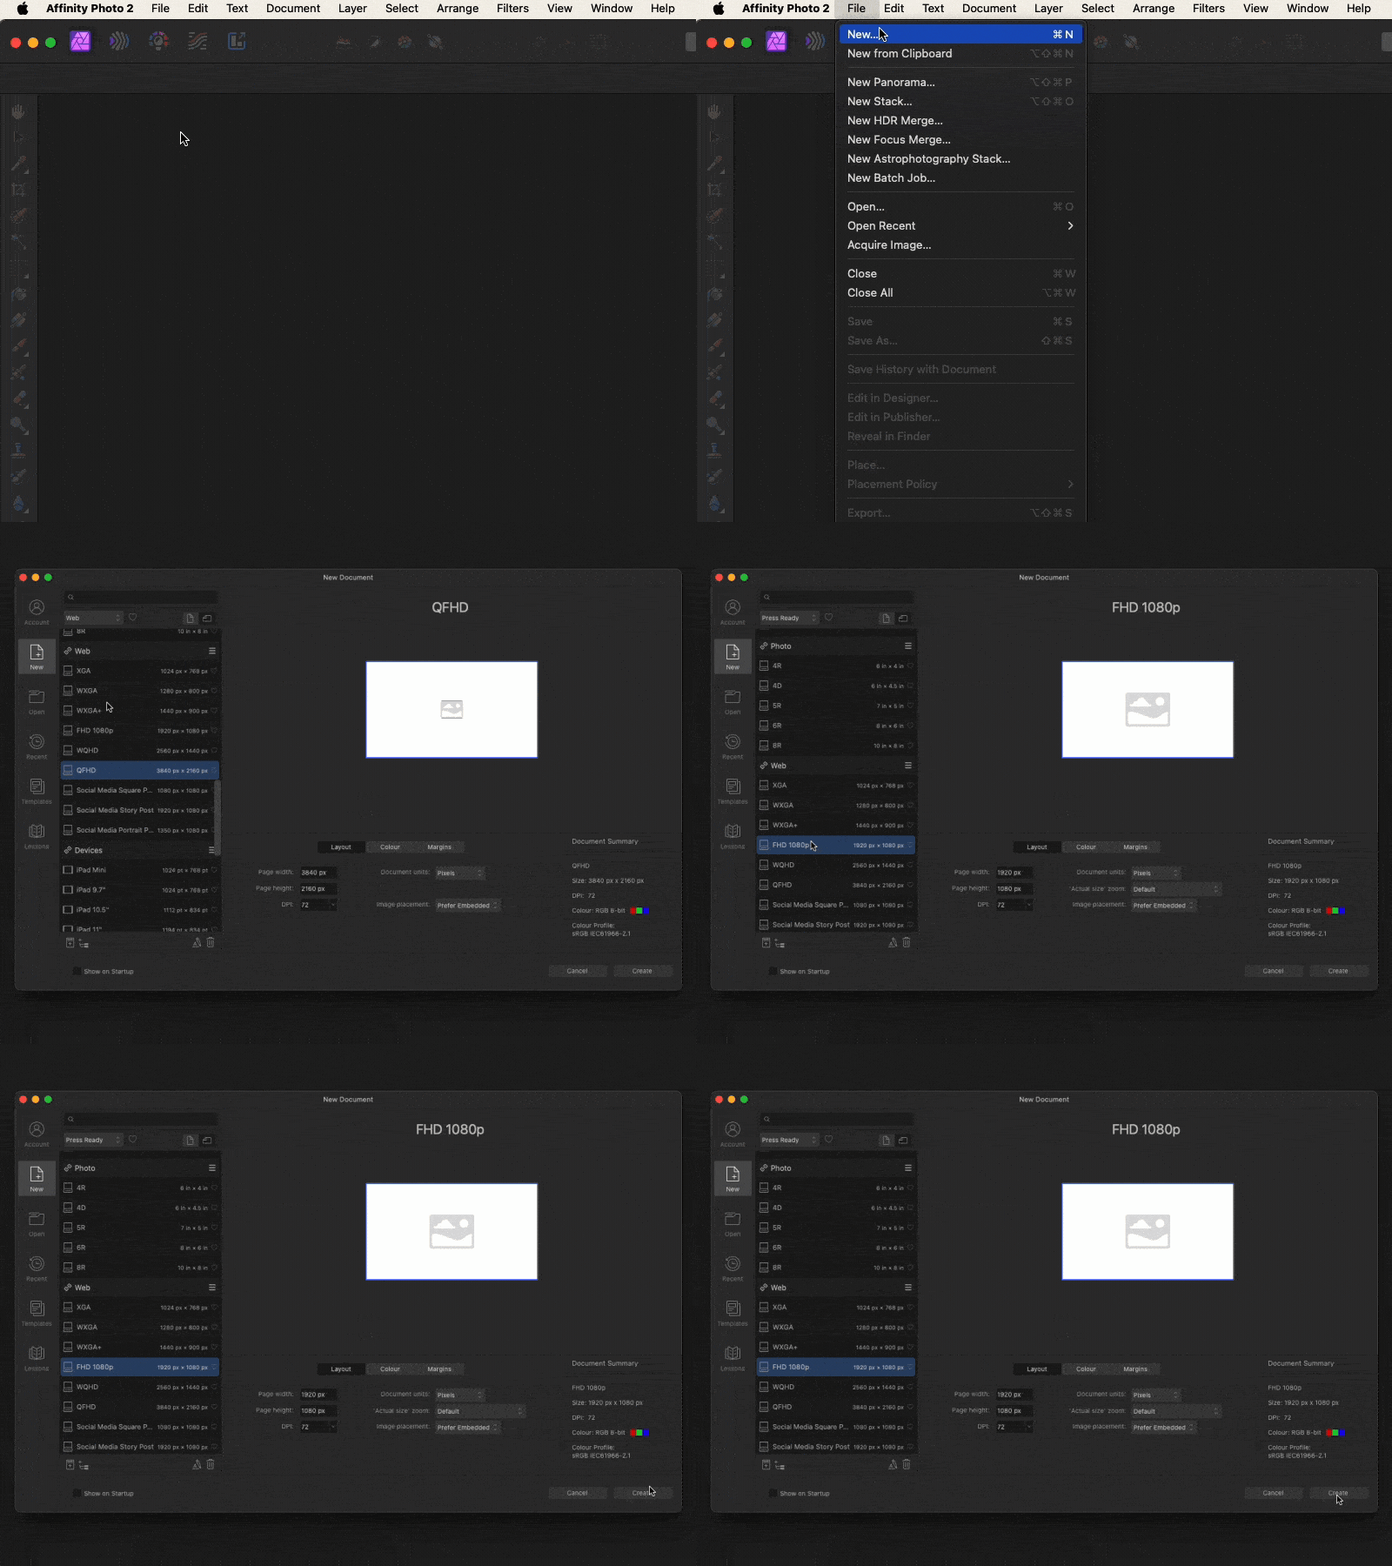
How to Create a New Document in Affinity Photo v2
- Launch Affinity Photo: Open the program.
- Open the New Document Window: Click on File in the menu bar and then select New. You can also use the keyboard shortcut Ctrl + N.
- Document Settings:
- Select Document Type: In the New Document window, you can choose from various presets such as Print, Web, Device, Photo, and more.
- Set Size: Customize the dimensions by entering the Width and Height values and selecting the unit (pixels, inches, etc.).
- Resolution: Typically, 300 DPI is used for print, and 72 DPI is used for the web.
- Color Format: Choose the necessary color format, such as RGB/8, RGB/16, CMYK/8, CMYK/16.
- Color Profile: Select the desired color profile. The default can also be used.
- Background (BG) Settings: Set the background to be transparent or a specific color.
- Create Document: Once the settings are complete, click the OK button to create the new document.

How to Use the Place Function to Import Images in Affinity Photo v2
- Prepare to Insert Image:
- Click on File in the top menu.
- Select Place from the dropdown menu.
- Select Image File:
- Clicking Place opens a file selection window.
- Locate and select the image you want to insert, then click the Open button.
- You can also drag and drop an image from Finder into Affinity Photo to import it.
- Place Image:
- Move the mouse cursor to the position in the document where you want to place the image.
- Click to place the image, or drag to adjust its size while placing it.
- When importing images from Finder, holding the Option key while dropping the image allows you to place the image.
- Adjust Image:
- Once inserted, the image can be freely adjusted in size, position, and rotation.
- You can resize or reposition the image as needed.

How to Import and Place Multiple Images in Affinity Photo v2
- Select Images in Finder:
- Open Finder.
- Select the multiple images you want to import. Use the Shift key or Command key to select multiple images.
- Drag Images:
- Click on the selected images and hold the mouse button down.
- While holding the mouse button, drag the images into the Affinity Photo window. Hold down the Option key and release the mouse button to activate the Place tab and place the images in the tab.
- Place Images:
- Select the desired image and click or drag it into the document to place it.
- When dragging the image, you can flip it by dragging to the left or upwards.
- Finalize Placement:
- If there are images left unplaced, you can press ESC to complete the process.
반응형